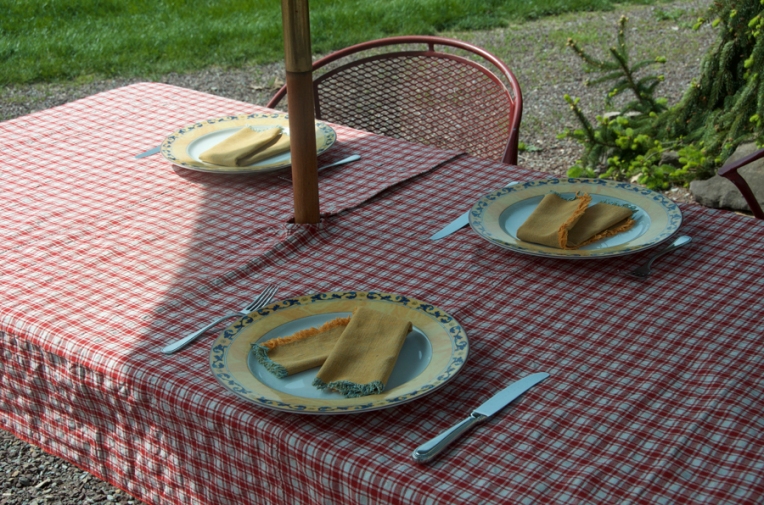
The gardensitter
May 19, 2013
Is there a worse time than May for a gardener to go on an almost three-week trip? Probably not. Therefore doubts kept creeping up on me as I was getting myself and the garden ready, covering the unplanted garden beds with black plastic so they would not turn into a weed patch, laying out soaker hoses, prepping seedlings, and writing to-do lists for the gardensitter – my husband.
He has been a gardener much longer than I am, and the garden is in good hands with him. Yet it is not easy to relinquish the care of one’s tender plants to someone else. I am sure my husband would have much more serious concerns if he were the one being away that long during this time of the year. He would find hay instead of a lawn upon his return because I have never touched a lawnmower in my life.
The division of yard work between us somehow fell into place without us ever talking about it, and it works perfectly. When we take visitors on a garden tour my husband always tells them that I handle everything under three feet tall: the flower and perennial beds, the vegetable garden, and the berry patch. He takes care of the lawn, trees, shrubs, and the many other tasks of a groundskeeper. Right now he needs to work double shift, rain or shine.
It is not only the logistics of the garden that made me second-guess the timing of my trip. It is also all the “events” that I will be missing. The crabapple blossom had just started when I left. I will be away when the alliums and the lilac bloom, and when the two new quince trees we planted will develop their first leaves. The day of my departure I saw the first fava beans, a premiere in my garden this year, breaking through the soil. I also saw a third seedling of the blue false indigo emerging, which thrilled me because coaxing the seeds into germination was a patience test. And, I noticed tiny yellow buds on the kale plants that I left in the garden from last year to collect the seeds, and I would love to see them fully open.
My precious gardensitter sends me email alerts about late frosts, usually a screenshot of the local weather report with the subject line, “What needs covers?”. And he does something else that is not in his job description: he takes a camera along on his daily maintenance rounds.
Me and my steam juicer
April 10, 2013
To celebrate that spring is finally here, I fetched one of the last jars of Concord grape juice today. As I mixed it with seltzer water it occurred to me that there would not be any of this homemade soda if it weren’t for the steam juicer. Therefore I simply must rave about this wondrous invention.
A steam juicer is a large pot where the base is filled with water and the top colander holds the fruits or vegetables. As the water boils and softens the fruit, the juice drips down from the colander into the juice kettle, from where it is released through a drain tube. The drain tube has a clamp so for the first hour or so, depending how hard and juicy the fruit is, you let the juice accumulate in the kettle, then open the clamp and let the juice run into a bowl placed underneath. I’ve had the steam juicer for several years yet I still relish the moment when I open the clamp – it feels a bit like digging for water or oil when a jet of the precious good eventually comes bursting out of the ground.
The yield is much bigger than with a jelly bag, it takes a fraction of the time, and it is no hassle at all to clean, just make sure you wash the steam juicer right after using; only the colander needs a bit of soaking sometimes. Except for grape juice, which I can as is with about ¼ cup sugar per quart of juice, I use most of the juice for making jelly.
The drawback: steam juicers are expensive, especially the stainless steel models cost $100 and up. I do not recommend aluminum because it reacts with acid. A steam juicer is a small investment but for me it is an essential canning tool, just like a few good tools are essential in the garden. A rototiller for the garden? Never! A steam juicer for the kitchen? Absolutely. I cannot do without it.
Gardening reality check
March 14, 2013
As a first grader on my way to school, I walked by a mansion whose front lawn was filled with thousands of crocuses in early spring. You had to peak through openings in the wall to see them, which made it even more tantalizing.
When I started to garden, I knew what I wanted – a view just like that! I envisioned looking out on a sea of purple from the kitchen window, and splashes of color along the driveway that would greet us every time we came home. So in two consecutive falls, with the help of my mother who herself is not a gardener but always ready to help, I planted more than 700 crocuses in different colors.
Almost a decade later, the crocuses are still there, doing well, slowly naturalizing. There is just one thing I did not consider. At the time when the crocuses bloom, the grass is still brown so you have to walk up close to see them. There is no sea of purple looking out the kitchen window, and I am afraid there never will be. To really enjoy the crocuses, you have to go outside and visit them, which I just did. A few had broken in the wind so I brought them in.
Half of me feels quite stupid about this, and the other half laughs. It seems to me those crocuses floating in water are smiling at me, too, saying, “Never mind, we still like it here.”
Pesto outlet
February 11, 2013
Once in a while even resolved home cooks like me agree to take-out pizza. With it we usually order a serving of garlic knots sitting in a puddle of very garlicky garlic oil. Seeing the ample, almost untouched amount of pesto in the freezer a few weeks ago made me feel almost guilty about eating garlic knots from somewhere else so I thought of ways to combine the two: pesto knots.
When it comes to pesto, I am a minimalist. I only use homegrown basil and garlic, salt, a good extra-virgin olive oil, and roasted walnuts. No pine nuts because the real, good kind from Lebanon is very expensive, and I find the Chinese pine nuts inedible. And no Pecorino or other cheese because I prefer to add it to the dish right at the table.
Immediately after processing the pesto, I fill it in small disposable paper cups and place them in the freezer until they are solidly frozen. I then remove the cups and tightly pack those pesto lollipops (lollipops without sticks, that is) in a large zippered freezer bag.
The yeasted knots are fun to make, and both times I made them we did not have trouble finishing them within a day or two (they can also be reheated in the oven).
Now that I have averted the danger of having to spread pesto on our breakfast toast in June to use up last year’s supply, I am starting to wonder whether this year my basil plants might get hit by basil downy mildew, a new highly destructive and quickly spreading disease. In gardening, everything is possible. Meanwhile, I will eat another pesto knot and enjoy it.
Pesto Knots
1¼ cups warm water
2¼ teaspoons active dry yeast
2 tablespoons olive oil
1 teaspoon salt
3½ cups flour (whole wheat or half whole wheat and half bread flour)
½ cup pesto
Extra-virgin olive oil for drizzling
1. Mix the water with the yeast and let stand for a few minutes until it starts to foam.
2. In a large bowl mix the olive oil, salt, flour, and the yeast mixture. Knead to a smooth dough using your hands or the dough hook of an electric mixer. The dough should be slightly tacky; add more water a teaspoon at a time as needed.
3. Cover and let rise for 2 hours.
4. Preheat the oven to 425 degrees F. If you have a baking stone, place it on the medium rack of the oven.
5. Briefly knead dough for remove any air bubbles. Divide it into 24 equally sized pieces using a sharp knife or a dough cutter. Roll each piece into a 6-inch rope of even thickness and twist it into a knot. If the dough starts to feel a bit dry, moisten your hands before shaping each knot.
6. Place the knots directly on the hot baking stone, or on a baking sheet, about 2 inches apart. After placing them in the oven spray them immediately with cold water. Bake in the preheated oven for 20 to 25 minutes, or until the knots are golden brown.
7. In the meantime mix the pesto with a few tablespoons of extra-virgin olive oil. Immediately when they come out of the oven, toss the knots with the pesto to coat them evenly.
8. Place the coated knots on a large plate or baking sheet in one single layer. If you pile them up hot as they are they will sweat and get soggy. Eat warm, or reheat in a preheated oven for 350 degrees for a few minutes.
Makes 24 pieces


